
Not only does new bar tape allow you to keep control of your bike when your hands get sweaty, it just looks pro. Fresh and clean bar tape even makes an older bike look new. Here's how to wrap your bars in a few easy steps.
Prep Them
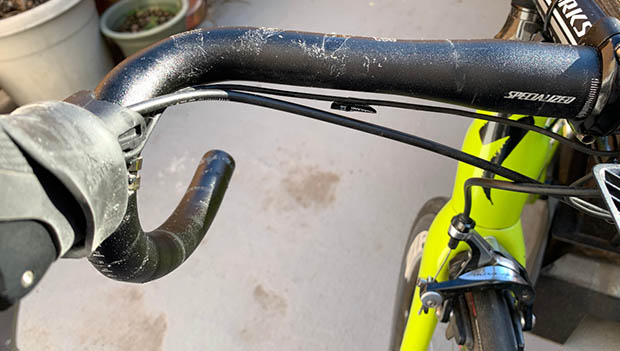
Remove your existing bar tape and clean the bars using a non-abrasive, non-destructive cleaner. Bars should be clean of sweat, grime and adhesive from the bar tape that has just been removed.
Examine Cable Security
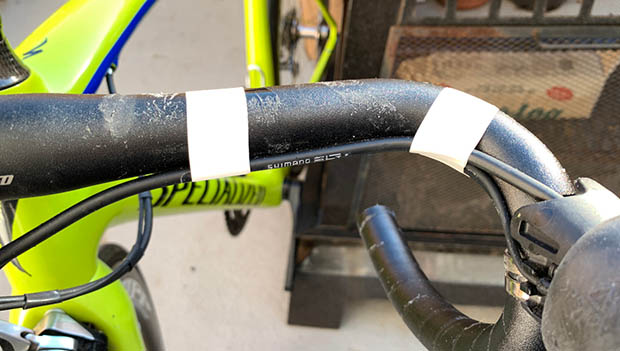
The brake- and shifter cables (or electronic wires if using Shimano Di2) should be held in place with electrical tape. Replace this tape if it appears worn. Two loops around the bars and cables should be enough.
Wrapping Direction
From the perspective of sitting on your bike you want to wrap the bars in the direction the tape is "loaded" when your hands are on the bars—so that the tape will wind more tightly as you grip the bars.

Start From Bottom
Wrapping the bars from the top down may allow the bar tape to unravel. Wrapping from the bottom to the top means as you grip the bars, you'll wind the tape tighter.
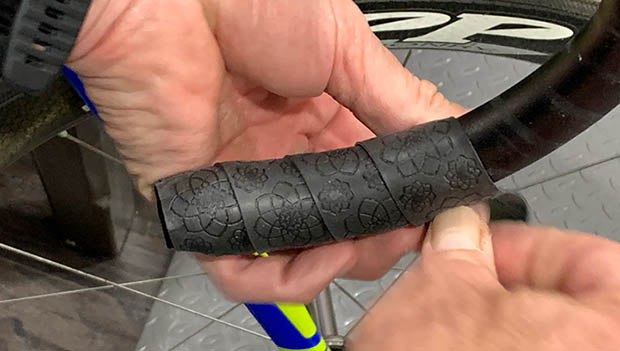
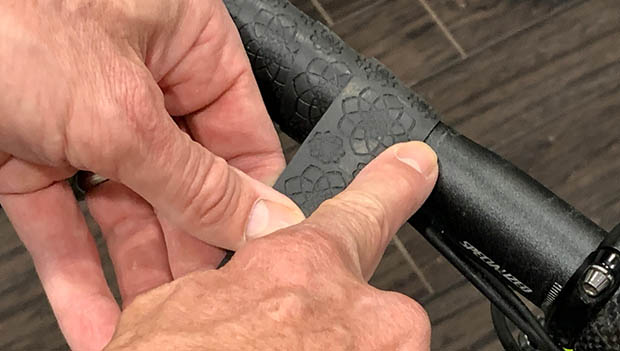
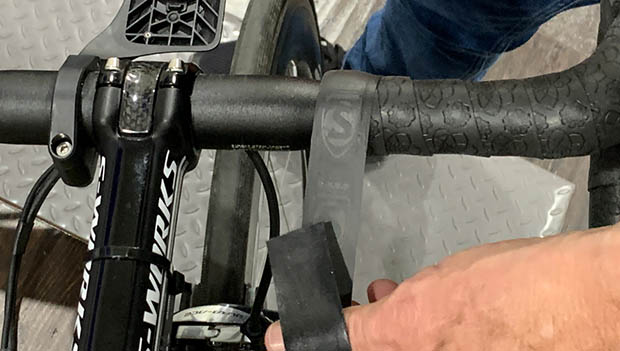
Off the Edge
When starting, the first wrap should extend off the edge of the bars by about half the width of the tape. After you complete wrapping the bars, you'll finish the ends so this overlap will look clean.
Overlap Bar Tape
For a neat look and to ensure the tape is evenly distributed from end to end, overlap each loop around the bars by about a quarter to a third of the width of the tape. Take care to not stretch the tape too tight. You want to wrap the bars with tension on the wrap but without stretching it enough to deform it. This may take some practice.
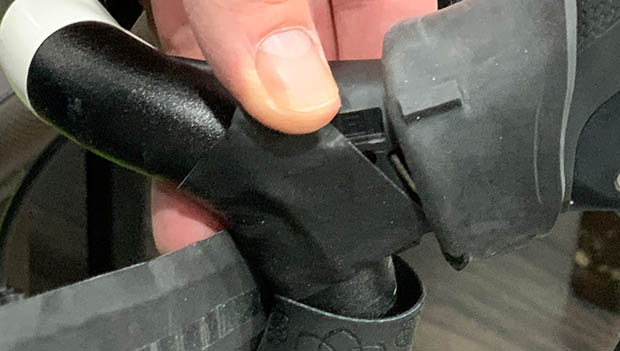
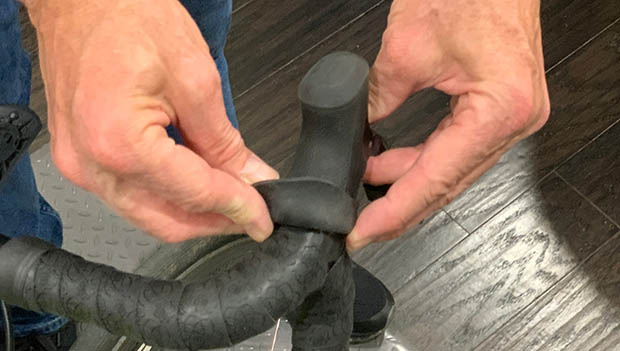
Brake Levers
A short, pre-cut section of tape should have been included with each roll of bar tape. Wrap the back of the brake lever clamp with this tape segment.
without stretching it enough to deform it. This may take some practice.
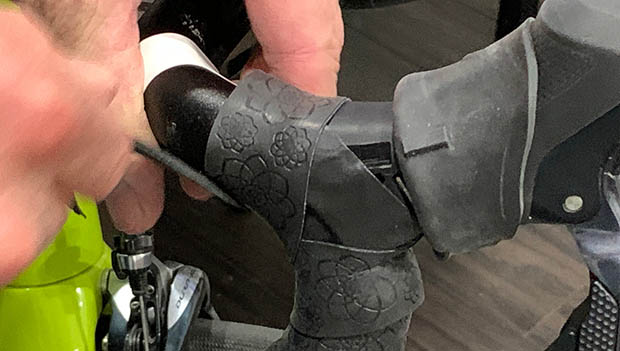
Hide the Mechanicals
The loop of tape just below the brake levers should partially cover the base of the lever body. Stretch the tape around the top of the lever body, overlapping the short segment of tape previously applied. Wrap the lever with a small amount of overlap across the top of the lever body. No brake lever clamp or body should be exposed. Take care not to cover any openings in the brake lever body that are needed for the brake lever hood to be correctly seated.
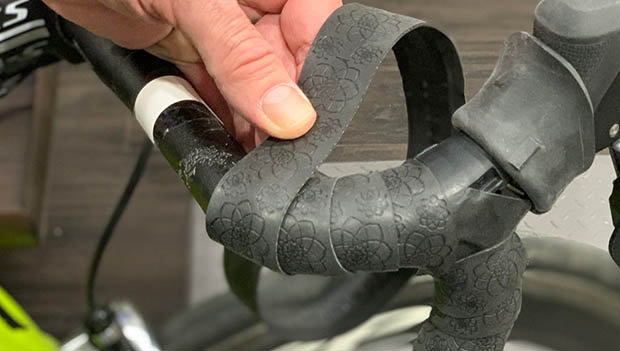
Around the Horn
Continue wrapping the bars around the bend, taking care to not leave gaps at the top outside or bunch the tape along the bottom inside of the bend in the bars.
Extra Loop at the Top
Continue wrapping the tape one revolution past where the tape wrap will complete, overlapping where the bar diameter gets wider. Cut off any excess tape.
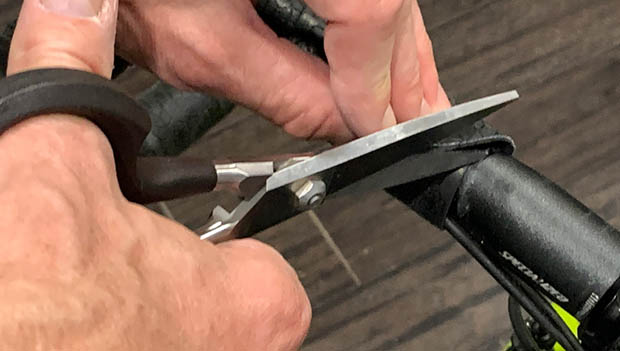
Cross Cut the End of the Tape
Cut a diagonal line from the top inside edge of the tape to the bottom outside (brake lever side) of the tape.
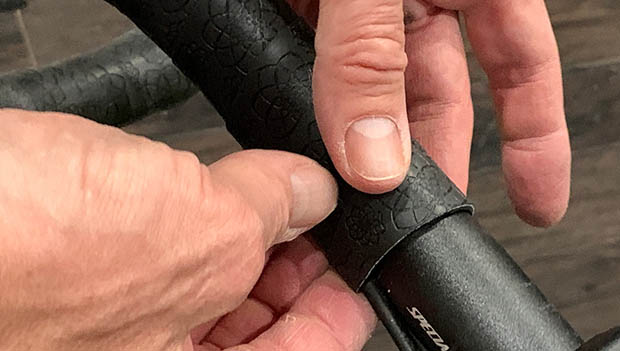
Full Stop at the Bottom
Complete the final wrap of the bar tape. The diagonal line you just cut in the tape should appear to be straight after the final wrap around the bars. The bar tape should finish on the bottom side of the handlebars.
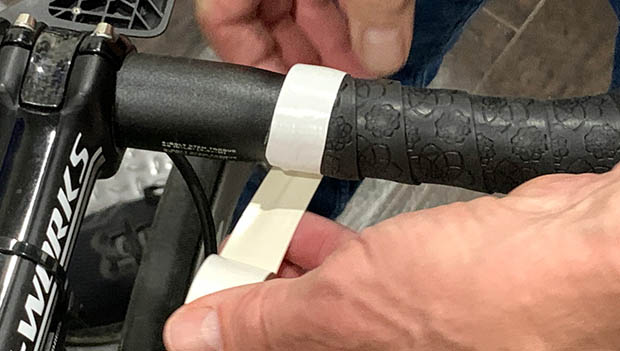
Secure the End of the Tape
Secure this final wrap of the bar tape with two wraps of electrical tape. It's OK to wrap the edge of the electrical tape along the edge of the bar tape.
Finishing Tape
Using the finishing tape supplied, wrap over the electrical tape used to secure the top end of the bar tape.
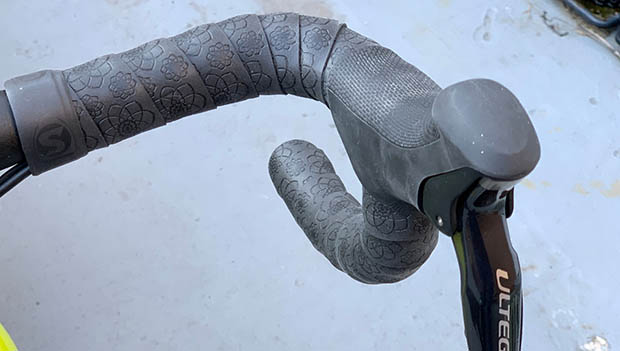
Unfold Brake Lever Hoods
Roll the brake lever hoods back in place.
Plug 'Em
Push the bottom end of the bar tape extending off the edge of the bars into the bars. Tap the bar end plugs into the ends of the bars. If there is an expansion bolt and screw used to keep the plug-in place, secure it.
Repeat on the Opposite Side
Perform the above steps on the other side of the bars.
READ THIS NEXT: Simple Bike Maintenance Tips: How to Swap Brake Pads