Ceramic cartridge bearings, like most steel cartridge bearings, have bearing retainers that separate the balls from each other. This reduces friction by preventing neighboring balls, whose adjacent sides are turning in opposite directions, from chafing on each other.
The bearing retainer may be asymmetrical, so when you remove the bearing seals (with a razor blade slipped under the edge), you'll see the balls on one side and you'll see the plastic retainer from the other side.
Proper maintenance requires cleaning out the bearing and pumping new grease into it, so before you press the bearings in, determine which side the bearing retainer is closed on and make sure that side faces inboard. That way, you can pry off the bearing covers and clean and grease them easily.
If your ceramic bearing has a symmetrical retainer concealing the balls on both sides like most retainers do in steel bearings, so be it; you'll have to just do your best to clean and grease them when the time comes.
In the accompanying instruction manual, SRAM recommends a service interval of 100 hours for the ceramic bearings in its Red crankset. While I think for most people who are not riding in the rain a lot or exposing their bike to high-pressure sprayers for cleaning, this will be excessive, it does make it clear that hybrid ceramic bearings do require fairly frequent maintenance for best service. So plan ahead for that time with your bearing orientation.

Figure 3
You can use your quick release (without
the springs) and a socket to press
bearings in. Select a socket of a diameter
just smaller than the bearing cartridge,
and gently flip the quick release lever
over, adjusting the end nut as you go.
Hubs
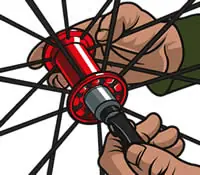
The closest thing the average home mechanic will have to a proper tool for pressing in a cartridge bearing will be a quick-release skewer and a socket wrench or the old bearing. Place the new bearing in proper alignment where it's going to go in.
Place a socket whose OD is just slightly smaller than your bearing's OD against the new bearing, or do the same with the old bearing (but if the bearing seat is deeper than the bearing, the old bearing can get stuck).
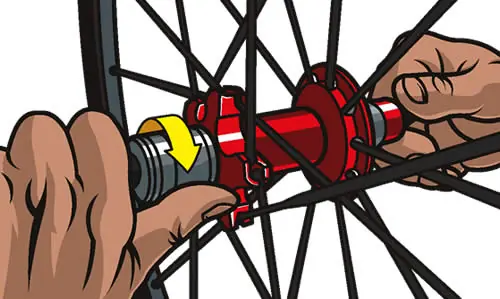
Using washers or something of the sort to protect the bearing seat on the opposite end, install the skewer (without the springs on it) and spin it to tighten it until the bearing is fully pressed in place (Figure 3).
If possible, do the same with the outer bearing in the freehub body once it is in place on the hub (Figure 4); otherwise, press it in as mentioned below for jockey wheels and pedals.

Figure 4
Or, rather than using the quick release as a press by flipping the lever, you can simply screw it in like a wing nut to press in the bearing.
Bottom Brackets
Enduro's external-bearing press/puller tool makes this process simple and repeatable, and it ensures complete bearing insertion and proper alignment. Stock bearings for FSA and Shimano have a 25mm inside diameter (ID); a thin plastic shim integral with the outer bearing cover brings the bore down to the 24mm diameter of the spindle.
If you are simply replacing the bearings and re-using the stock seals, get 25mm ID bearings. Enduro's Shimano/FSA replacement kit instead uses a 24mm ID bearing and a thin outer silicone cover seal instead of the stock one.


