

There are two types of runners: those who only run and those who are balanced, well-rounded athletes. And with statistics estimating that as many as 90% of runners miss training time every year due to injury, you'll likely want to do whatever you can do avoid injury this year.
Enter: strength training. There's a belief in the running community that strength training will bulk you up and slow you down. However, runner-specific strength training—emphasizing movements that will directly correlate to running performance—is one of the best things you can do for your body. No bodybuilding type training required! We're not training glamour muscles, but rather the muscles that propel you forward with every foot strike. Applying just a few key strategies can help you get stronger, prevent injuries, and run faster. Strength training works to improve various structural weaknesses in your body.
Related: Why Runners Need Upper Body Strength
Very often this eliminates the source of nagging, common running injuries (runner's knee, we're looking at you!). The stronger you get, the more resilient your body will become to the demands of running. A well-rounded strength training program, like the one below, will help get you stronger from head to toe, especially in your hips and glutes—two chronically weak areas for most runners. All it requires is roughly 20 minutes of your time 2-3 times a week whenever you can squeeze it in.
This routine is designed to complement training, not tire you out so you're too sore and fatigued to run.
How To Use This Program: 2-3 times per week 2-4 sets of 8-12 reps* Go through exercises A-G once and rest for one minute afterward. That's one set. Complete 2-4 sets based on current fitness abilities.
*Note: Start on the lower end of the set and rep spectrum and select a weight you can use for 8 reps. Example: the first week you'd probably be doing 2 sets of 8 reps of each 2-3 days a week. As you get stronger, track how many sets and reps you are doing to gauge your progress. As you reach the upper threshold of the rep and set scheme, you can start thinking about going up in weight and dropping back down a bit in reps to account for the heavier load.
A) Dumbbell Overhead Press
Stand with your feet shoulder-width apart and squeeze your quads and glutes so you are using only your upper body to press. Hold a pair of dumbbells just outside of your shoulders with your arms bent and palms facing each other. Press both dumbbells up until the weights are overhead and your arms are straight. Pause, then lower the dumbbells under control back to the starting position.
B) Dumbbell Deadlifts
Hold a pair of dumbbells in front of you with an overhand grip, palms facing the body. Hinge forward at your hips, slightly bending the knees, lowering the dumbbells to the ground without allowing your back to round. Brace your core and lift back to the starting position.

C) Bent Over Dumbbell Rows
With a dumbbell in each hand, palms facing your in, bend your knees slightly and bring your torso forward by bending at the waist. As you bend make sure to keep your back straight until it is almost parallel to the floor. Lift the dumbbells to your side, keeping your elbows close to your body. At the top, squeeze your back muscles and hold for a second then lower back down.

D) Air Squats
Start with feet about shoulder to hip width apart, using a target behind you if you need to squat to something for full depth. Let your hips descend back and down, with your hips going below your knees for full depth, taking care maintain a lumbar curve and to not round your back. Keep your knees in line with your toes and return to full standing position.

E) Front Plank
Place your forearms or palms shoulder-width apart on the ground with the elbows stacked below the shoulders. If flat palms bother your wrists, clasp your hands into fists. Press your toes into the ground and squeeze your glutes, core and legs to stabilize your body. Maintain a neutral neck and spine by looking at a spot on the floor about a foot beyond the hands. Hold for 30 to 60 seconds.
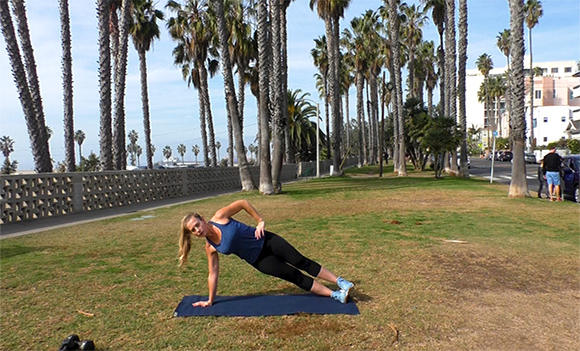
F) Side Plank
Lie on one side with the legs stacked on top of one another then prop the body up on your hand or elbow while keeping your feet stacked. Take care to not let your hips drop—think about driving your bottom hip up to the sky to engage your hips and obliques. Hold for 30 to 60 seconds per side.

G) Hand Release Push Ups
Start in the top of the pushup position and lower yourself down until your whole body makes contact with the ground. Release your hands from the ground and pull your arms up towards the ceiling, then place them back down and perform a pushup.