
There was a time only professional runners and top-ranked age groupers included drills in their training plans. Now, however, drills are being implemented by every category of runner—from beginner to record holders—as a means of both improving form and reducing the risk of injury.
As you build your training plan for the year, add a few of these post-run drills to decrease your risk of injury, improve coordination, add power and improve your overall kinesthetic awareness.
Lateral Hops
Distance runners tend to move only in one direction: forward. As such, our prime movers (calves and hamstrings) are constantly engaged and can easily become overloaded, particularly if imbalances exist. Our lateral stabilizers (TFL and IT bands, gluteus medius and peroneal tendons) can provide support for the calves, hamstrings and gluteus.
A simple lateral hop drill will effectively allow this "support crew" to strengthen and stabilize your prime movers and help reduce injuries associated with overloading prime muscle groups. Following one to two runs weekly, engage in these hop drills as follows.
- With legs shoulder-width apart, begin by pushing off with the left foot to jump to the right.
- During the jumping phase, get four to six inches off the ground before you land on your right foot as your legs come together. Upon landing with legs together, immediately separate the legs and repeat the elevation push off with your left foot.
- All of this occurs in one fluid motion. At no time should your legs cross each other.
- Perform 8 to 10 lateral hops to the right before replicating the same motion moving left (during which, the right foot is deriving your power and elevation and you will be landing on your left foot).
- Move in each direction 3 to 4 times, with 5 to 6 lateral hops in each direction.
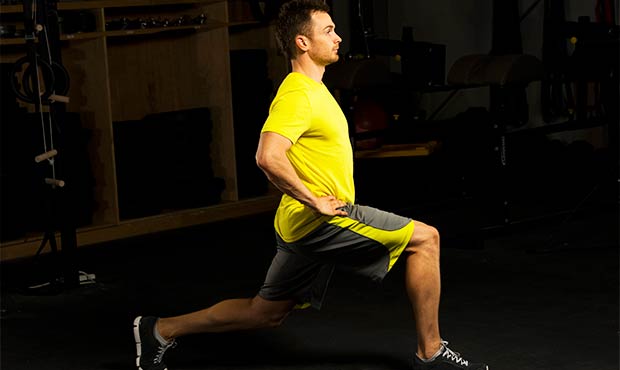
Walking Lunges
Lunges are an outstanding way to strengthen and stabilize everything down the kinetic chain from hamstrings, glutes and quads to lower leg power tools, such as the soleus and plantar fascia. A properly executed walking lunge can add stability and coordination to reduce injury chances.
- Start with one knee propped up in front of you at a 90-degree angle and your other leg straight and relaxed underneath you.
- Once set in this position, engage the quadricep and gluteus on the lead leg to step forward into a lunge while engaging the other leg at 90-degrees behind you.
- Your lead leg should be doing virtually all of the work bringing you from a kneeling position to up and walking. Your rear leg should do little to no work in bringing you from the lunge to standing position.
- Engage 6 to 8 steps on each leg (12 to 16 steps total), starting with one set twice weekly. Within 4 months, increase the number of sets so you are performing 2 to 3 sets of lunges 3 to 4 times weekly.