
You've seen them: iconic black-and-white images of stoic mountaineers trudging over mounds of snow and across winter landscapes, perhaps to their warm cabins, perhaps to the unknown. Their garb is what you'd expect—heavy jackets of pelt, fur warming the face and hands—and attached at the feet is an invention making the entire plight possible: snowshoes.
This invention of old was a pragmatic design of birch bark, bent to make a side rail, and moose hide stretched to form a platform over the snow. They worked wonderfully then, just as they do now, with the invention becoming a modern staple of winter-time recreation.
The benefits of snowshoeing, especially when compared to many other winter sports, are vast and diverse: it's a low-impact exercise, inexpensive, easy to learn, gives access to hidden terrain, and is available to all ages. There's really no more accessible winter sport around. Here's a quick guide to get you out and trekking through the snow.
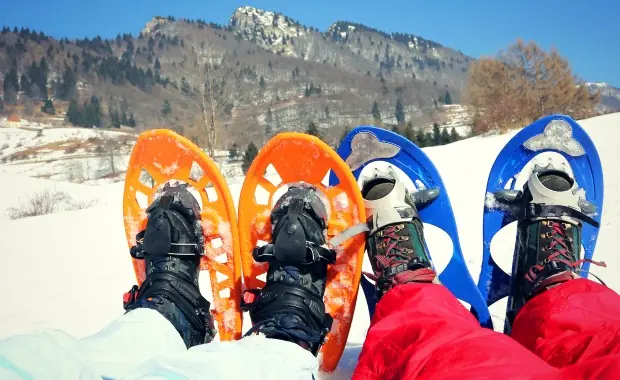
Anatomy of a Snowshoe
The basic function of a snowshoe is to create a walking platform over the snow. This disperses your weight and keeps you from sinking; the bigger a platform, the more weight they can bear. There are two modern types of snowshoes: aluminum and composite (plastic). Both types have bindings, toe crampons (the spikes that give traction), a heel crampon or braking bar, and a side rail. Some shoes are equipped with a heel lift, which helps with uphill hiking by giving more of a level step. You'll also find that some shoes have a more aggressive side rail; the purpose of this is to provide a better grip which is important for mountaineering. Shoes also vary in length; longer snowshoes can handle more intense terrain.
Beginners should start with a composite shoe that's shorter in length. This shoe will be easier to handle and less expensive (if purchased). Beginners should also rent the snowshoes the first time out to ensure that you actually enjoy the sport. Rentals are roughly $20 a day for adults and $10 for children.
Purchasing snowshoes can range anywhere from $100 to $300 for adults and $20 to $70 for kids; the offseason is the cheapest time to purchase them (or any winter gear, for that matter). The more you pay for snowshoes correlates with the quality of the bindings; the toughest part of the sport is getting the shoes on and off your feet. The better the binding, the less time and effort this will require. Cheaper bindings may have to be adjusted each time. But, as a beginner, this will not be a primary concern, considering your snowshoes will usually be applied from the comfort of your car.
Types of Terrain
Flat terrain is best for entry-level snowshoeing. The less aggressive and shorter models are designed for this type of adventure; kids models are also designed this way. Flat terrain will usually have packed down snow that is not very deep. Keeping to a broken trail—one that's already been walked on—also makes for an easier hike.
Rolling terrain is the next level of difficulty, which is a little steeper and a little more off country, but not mountainous. This requires a slightly more aggressive snowshoe.
Mountain terrain is the most difficult as it's steep, can be icy, and does not always have broken trails. Mountain snowshoes will be the most aggressive, with hardier crampons, side rails and bindings. The nice thing about mountain snowshoes is that, even though they're overbuilt for easier terrain, they can still be used anywhere.
Snowshoe tails are also available to bring with you to help adjust to the terrain. Tails are additions that can make your shoes longer or shorter. They're good for less compact snow. Just remember, however, longer shoes create more drag and, therefore, require more effort.
Finally, there's also a running snowshoe available that's smaller, lighter and has an easily adjusted binding. This shoe allows minimal twisting and should not be used in areas that require hiking.
So when selecting your snowshoes, ask yourself these three questions:
- How much do you weigh, including your pack? Snowshoes have weight ranges that will be on the label. Keep in mind that snowshoes are also specific to gender.- What conditions will you be in? Assess how much snow there's going to be, what physical shape you're in, and remember that snowshoeing requires different muscles that you may not be used to exercising.
- What terrain will you be scaling?
Accessories
Trekking poles are essential. This is where your support comes from and what helps you maintain your balance. Ski poles will work for this sport; just make sure the poles have a basket on them, and keep extra baskets with you as they're prone to breaking. As a basic rule, when the pole in planted on the ground, your forearm should be parallel with the ground; your elbow should be at a 90 degree angle. There are two types of trekking poles: clamp style and screw style. The clamp style is becoming more popular and will be more convenient to use.
Other things to bring include:
- First-aid kit- Headlamp (with spare lithium batteries; alkaline batteries may fail in the cold)
- Warm liquids in a thermos
- Water (in an insulated system so it reduces freezing)
- Sunglasses
- Sunblock
- Hand warmers
- Map and compass
- Gloves (and possibly a spare pair in case the first get wet)
- Hat or headband
- Backpack
As for clothing, wear layers that can be adjusted according to the weather and your activity. Use a base layer, but don't use cotton in winter; an insulating layer, wool is great; and an outer layer, something waterproof and breathable. If you start sweating, stop and take off layers. Sweat will ultimately make you cold, especially when you stop for breaks. Footwear is also very important; it must be waterproof and breathable. Hiking boots and trail runners work great with snowshoes; cross-country ski boots will work too. Don't use pack boots as they're too warm, and don't use tennis shoes. Gaiters are also highly recommended to keep the snow out of your boots.
Basic Advice
Take advantage of your snowshoes; winter allows you to travel in areas you can't access in the summer, such as brush or wetlands. Don't be afraid to explore.
With that said, always use common sense. Don't cross rivers, streams, or lake beds if the ice is too thin. Also, be aware of the dangers of hypothermia, frostbite and dehydration. Winter hiking actually requires a lot of water consumption because the dry, frigid air saps it from your system. You should also be aware of the dangers of avalanches. Always tell somebody where you're going.
Snowshoeing is quite easy though and, especially for beginners, free from most of these dangers. If you can walk, you can snowshoe. Because of this, you can use nearly all of the same trails you do in the summer. Just take time getting used to the shoes, use big circles to make turns, and stay on broken trails until you get the hang of it. Most importantly though, have fun and enjoy the unique scenery the sport allows.
Related Articles:
 Book your next camping trip
