Shooting a lay-up is an important skill to master. See my tips the Stride-Stop Lay-up and Shooting after Ending a Cut or a Drive. There are times, however, when shooting a lay-up on the side of the basket on which you end your cut or drive is not advisable. The player guarding you may be taller, or an opponent may be occupying your take-off location for a regular lay-up.
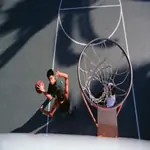
A cross-over lay-up will help deal with either of these two situations. Executing this lay-up involves ending your cut or drive on one side of the basket, stepping under the basket with the non-pivot foot, jumping off that foot, and shooting the lay-up from the other side of the hoop.
Knowing how to shoot a normal lay-up will make it easier for you to become proficient at shooting a cross-over lay-up.
Follow each of the steps below to learn how to execute a cross-over lay-up.
STEP 1 - The Stance
i) If you are right handed, stand on the left side of the hoop so that you are ready to shoot a left-handed lay-up.
STEP 2 - The Step-In
i) Once in the correct stance, pivot on your right foot so that your shoulders are at right angles to the backboard, as you step with your left foot towards the hoop. During this manoeuvre, keep the ball high.
STEP 3 - The Take-Off
i) As your left foot contacts the floor use it to jump while you extend both arms forward and upward. Keep the right hand cocked, ready to shoot.
STEP 4 - Ball/Basket and Body/Basket Relationships
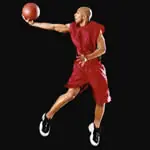
i)As you reach the peak of your jump, your hands should be ready to shoot a right hand lay-up.
ii) As you reach the peak of your jump, the basket should be directly above your shoulders or slightly in front of them. How much in front, depends on your reach. By keeping your body in this position, you do not allow an opponent to get between you and the basket to block the shot.
STEP 5 - Shooting the Ball
i) At the peak of your jump, shoot a right hand lay-up as described in my tip the stride-stop lay-up.
STEP 6 - Ending a Drive or a Cut with a Stride Stop
i) After practising steps 1 thru 5, stay on the left side of the hoop and move away at a 45 degree angle from the basket 10 or 12 feet.
ii) Dribble slowly toward the basket. It does not matter which hand you use to dribble. Because you will be shooting with your right hand, execute the stride stop so your right foot is the pivot foot.
iii) As you complete the stop, execute steps 1 thru 5. As you become more proficient, increase the speed at which you advance the ball.
iv) Practise executing cross-over lay-ups after cutting and receiving a pass near the basket. Do not use a dribble.
STEP 7 - Ending a Drive or a Cut with a Front Stop
i) Repeat step 6 using a front stop rather than a stride stop.
ii) When using a front stop, initiate a left-hand lay-up, but execute a right hand cross-over.
NOTE: A left-hand cross-over is a mirror image of the right hand cross-over


Discuss This Article